Introduction
My Garmin GPSmap 76C which I’ve previously used for comp navigation was playing up (switching itself off intermittantly) so I decided to buy a dedicated paragliding alti-vario-GPS combo. My friend Nick had recently bought a B1 Nav and had said good things about it so I took the plunge and bought one from Patrick at UK Airsports.
The first thing to note is that at £499 list price it’s considerably cheaper than similar competition ready units such as the Flytec 6020 GPS (£699), Aircotec XC Trainer Dual (£750) and Brauniger IQ-Compeo Plus (£899). This is not an exhustive list but it gives an idea of what it’s up against. I’ll say right now that I’ve never used any of these before so they may well have more features than the B1 Nav. My frame of refernce is a Garmin GPSmap 76C and a Flytec 4010 alti-vario, although I tended to have the audio switched off on it and used the audio from my backup Solario instead.
For UK xc flying you’ll still need a Garmin map capable unit (or equivalent) to display airspace (see Simon Headford’s Garmin airspace site here), but for comp flying this is certainly all you need, although you will probably want a backup GPS unit just in case you have problems with your primary unit.
This review will cover use of the B1 Nav for comp flying, which if you’ve been following my blog recently, you’ll know I got to goal on all six tasks in the recent British Open in Slovenia using it. Part two of the review will cover its use in UK xc flying, but I haven’t yet used it in the UK so that’ll have to wait.
In the box
The package contains a continental USB charger with a UK adaptor, and also a standard USB lead. The unit itself arrives inside a rather nice semi-hard case though to be honest it’s not that useful since most people will keep it permanently attached to their flight deck. The attached lanyard is only just long enough to allow you to attach it to a loop on your flight deck, so removing it is not something you’ll be doing after every flight! I’m protecting mine (and the whole flight deck) by sliding it into my balaclava when it’s in my small equipment bag. I opted for the velcro backed soft case too, which allows you to attach it to a flight deck. This works well and doesn’t hinder use of the buttons, not that you really need to use them in-flight.
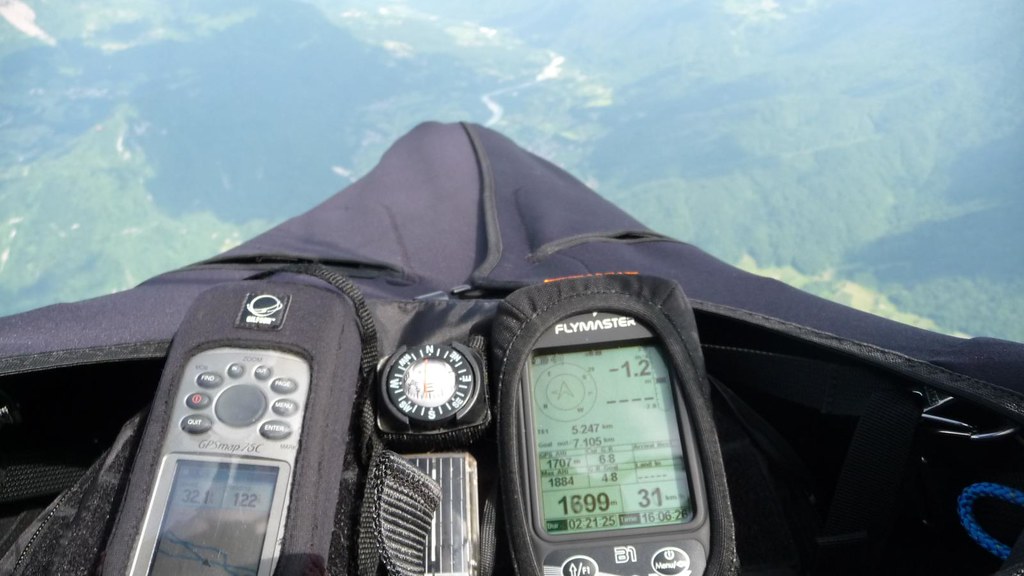
The screen is a decent size and is very clear (you can adjust the contrast) and contains all the flying info on the one screen – ie. there is no concept of having different pages for different functions, although with firmware 1.16 you can now define two groups of user defined fields (UDF) and switch between them with a long press of one of the three customisable buttons, however all other screen functions remain the same.
Setting up
The menu system is very easy to use allowing you to access all the settings and set up waypoints and a task by just using the four buttons. I say “a task” because it only allows you to have one task, which is automatically made active. This is deliberate so that there’s no danger of navigating the wrong task in a comp!
Once you’ve uploaded all the waypoints to the unit using GPSdump (which lets you import *.wpt files), setting up a comp task is simplicity itself. First you add the waypoints (turnpoints) to the task, starting with the take off turnpoint, then add the other turnpoints in turn. If the start is a 2km “start out/enter” cylinder around turnpoint T21 say, then you have to get T21, you just add T21 twice. Similarly for the goal – I entered that twice, once as a 400m goal cylinder, then again as the landing, which lets you specify a land by time, which can then be displayed as one of the twelve UDFs (ie. land in x hours y mins z seconds).
Having entered all the turnpoints you then you edit the task and edit the waypoints as necessary, setting the type (ie. start in/exit, start out/enter, goal cylinder, goal line, landing, turnpoint etc). Depending on the type of turnpoint you choose, other fields become available – ie. distance and time fields. So for the start fields you enter the start time, for goal and landing types you enter the goal close time and land by time respectively. All super-easy and quick to setup compared to doing it on my Garmin, and I suspect easier than many of its competitors.
In the air
Up until the start the bottom left field on the screen displays the TTG (Time To Go until the start), then once the start time has passed it automatically switches to the task duration. When you reach goal the duration automatically stops – nice!
Once you’ve taken off the track logging automatically starts (so there’s no danger of not recording your track), and the the arrow in the top left of the screen (the “compass”) points to the optimum position of the start cylinder to head for, given that it knows where the next turnpoint is. A field under the compass shows your distance to the start cylinder, and highlights it if you’re inside when you should be outside, or outside when you should be inside. Again, all clear and easy to understand. There’s even a UDF that shows you the groundspeed you need to fly at in order to get to the start cylinder on time – when it reaches your current groundspeed you can go for it!
Once you’ve started correctly the compass automatically points you to the optimum point on the next turnpoint’s cylinder and gives you an audible beep to let you know you’ve got that turnpoint. Regardless of what tracking interval you’ve set, once you’re inside the cylinder it automatically switches to recording at one second intervals, so there’s no need to spend any extra time inside the cylinder to ensure that you’ve got at least one point inside it.
So navigating a cats cradle type task is super-easy and very intuitive. The only thing I’d like to see over and above what it already displays is some indication of what direction you’ll be turning once you’ve got the upcoming turnpoint, however unless you’re shit-hot this isn’t much of a problem really as there will be gliders in front of you :-). In fact the compass gives you a clue once you get close to the turnpoint because there’s a smaller arrow pointing to the turnpoint itself, so if it’s telling you to steer to the left of the turnpoint then you know you’ll be turning left once you’ve bagged it.
As for the six UDFs you can display at a time, I’m not sure I’ve got them perfectly set up yet, but I had a pre and post-start groups:
Pre-start:
| GPS alt | Cur GR | Thermal distance |
| Max height | GR to Goal (not very useful 🙂 ) | Speed to start |
Post-start:
| Dist Edge (dist to edge of cylinder) | Cur GR | Thermal distance |
| Max height | GR to Goal | Land in (x hours y mins z secs) |
Info such as distance to next turnpoint and distance to goal is displayed under the compass so there’s no need to set those up as UDFs.
Vario
I almost forgot – how does it work as a vario! Well, very nicely indeed it turns out. There are a whole raft of acoustic and threshold settings you can fiddle with, but I was very happy with the defaults. There are effectively five audio bands depending on how fast you’re climbing or sinking:
| Climb rate | m/s | Sound |
| Above climb threshold | > 0.1 | Typical vario sound |
| Buzzer threshold to climb threshold | -0.2 to 0.1 | Growling buzzer |
| Sink threshold to buzzer threshold | -2.0 to -0.2 | Silent |
| Sink alarm to sink threshold | -5.0 to -2.0 | Typical vario sound |
| Below sink alarm | < -5.0 | Very attention grabbing alarm sound! |
What makes the B1 different to most (all?) other varios is the “growling buzzer” sound when you’re near to lift. (Ok, so you’re actually in lift when you hear it, just not necessarily going up). This gives you a bit of warning when you’re approaching lift and I found it worked well, although often I could feel my glider being pulled into a thermal even before the buzzer sounded. But essentially the buzzer is telling you you’re in zeros and you should be looking around for some decent lift nearby.
When I’ve swapped varios in the past I found it sometimes took me a while to adjust to the sounds and behaviour of the new device, but coming from the Flytec / Solario combination I immediately felt at home with the B1. One thing I noticed pretty quickly was how much more peaceful my flying was than before! I obviously had my sink threshold set higher on my Solario, because with the B1 it was silent much of the time (ie. between -2.0 m/s and -0.2 m/s), which was very pleasant indeed (though no doubt I could have adjusted the Solario to behave in a similar manner).
Wind speed/direction and last thermal indicator
The wind speed and direction indicator is very useful in Alpine conditions where valley winds come into effect and change through the day. The direction is indicated by a small windsock on the outside of the compass and the speed is displayed in km/h next to the compass. The direction seemed accurate, though I’m not quite so sure about the speed. It sometimes seemed quite high given my drift, but I might have been imagining that.
The last thermal indicator is a new feature in firmware 1.16 and it seemed to work very well. Using the blob on the compass in conjunction the the distance to thermal UDF, it was easy to find your way back to a thermal if you’d fallen out of it, or if you had gone searching for stronger lift but not found any. It stores the thermal’s position every 50m (vertical), so if you drop out and sink 50m you can go to where it was at that height, though I don’t know whether it takes account of any drift if you arrive a minute later say. One to ask the developers…
Overall
I think the fact that I made goal every day and had no problems either navigating in-flight or with my tracklog afterwards sums it up nicely! Seriously though, by combining an excellent vario with really easy task setup and navigation at a very competitive price, I think Flymaster will have a lot of success with the B1 Nav. Having said that, there are one or two things missing from it at the moment – no dedicated elapsed time start types (though they are coming in firmware 1.17 I believe) and no integrated mapping, even simply showing you which way you’ll be turning at the next turnpoint. But these are definitely not showstoppers, and if you’re in the market for a combined alti-vario-GPS I’d recommend you check it out. Flymaster are responsive to their customers and update the firmware regularly, so if it hasn’t got a feature you want right now, there’s every chance it will have it in the future.
Sadly I had to pay for my own unit, and I’m not associated with Flymaster in any way – I’m just a satisfied customer 🙂
In part two I will evaluate how it performs for typical UK xc flying.
Find Flymaster on the web here (www.flymaster.net)
Flymaster B1 Nav thread on pgforum here (pgforum)

Leave a comment